
Tutorials
Add your card to Apple Wallet or Google Wallet
Your customer taps "Agregar a Apple Wallet" or "Agregar a Google Wallet", confirms, and their stamp card is saved in the phone wallet.
This tutorial explains, step by step, how a customer saves their stamp card into the wallet on their phone: Apple Wallet on iPhone or Google Wallet on Android. Follow it to understand the customer experience so you can guide them or share these steps.
Before you start
Three things worth knowing:
The wallet option is enabled per business
The "Agregar a Apple Wallet" (add to Apple Wallet) and "Agregar a Google Wallet" (add to Google Wallet) buttons may not be enabled for your business yet. If your customer does not see them, message us and we will gladly activate the option for your card.
The card lives in the phone wallet
Once added, the stamp card sits inside Apple Wallet (on iPhone) or Google Wallet (on Android), next to the customer other cards. No app needs to be open to see it, and the phone can remind them of the card when they are near your shop.
iPhone uses Apple Wallet; Android uses Google Wallet
The steps are the same on both: the customer taps their wallet button, waits a few seconds, and confirms. Each phone shows the matching wallet, so the customer never has to choose.
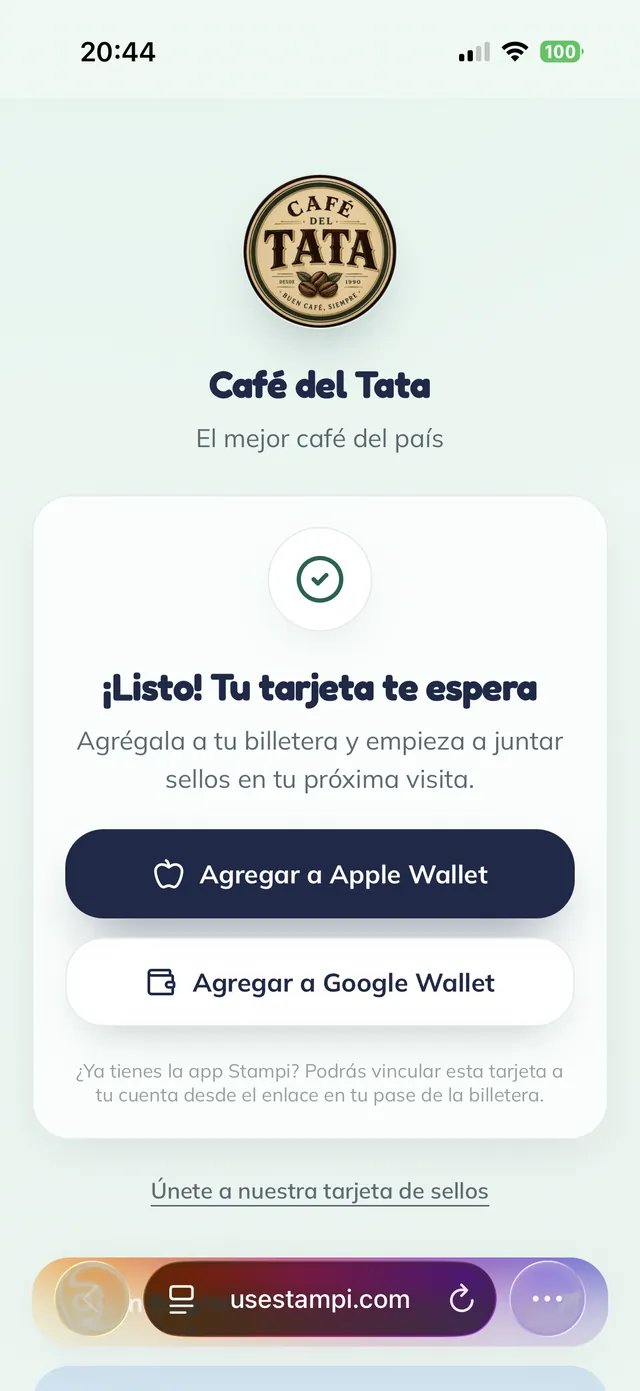
The add-to-wallet buttons
When your customer receives their card, they reach this screen: "¡Listo! Tu tarjeta te espera" (all set, your card is waiting), with two buttons, "Agregar a Apple Wallet" (add to Apple Wallet) and "Agregar a Google Wallet" (add to Google Wallet). From here they save the card into their phone wallet, with no download.
Note: Your customer does not see these buttons? The wallet feature is enabled per business. Message us on WhatsApp and we will gladly turn it on for your card.
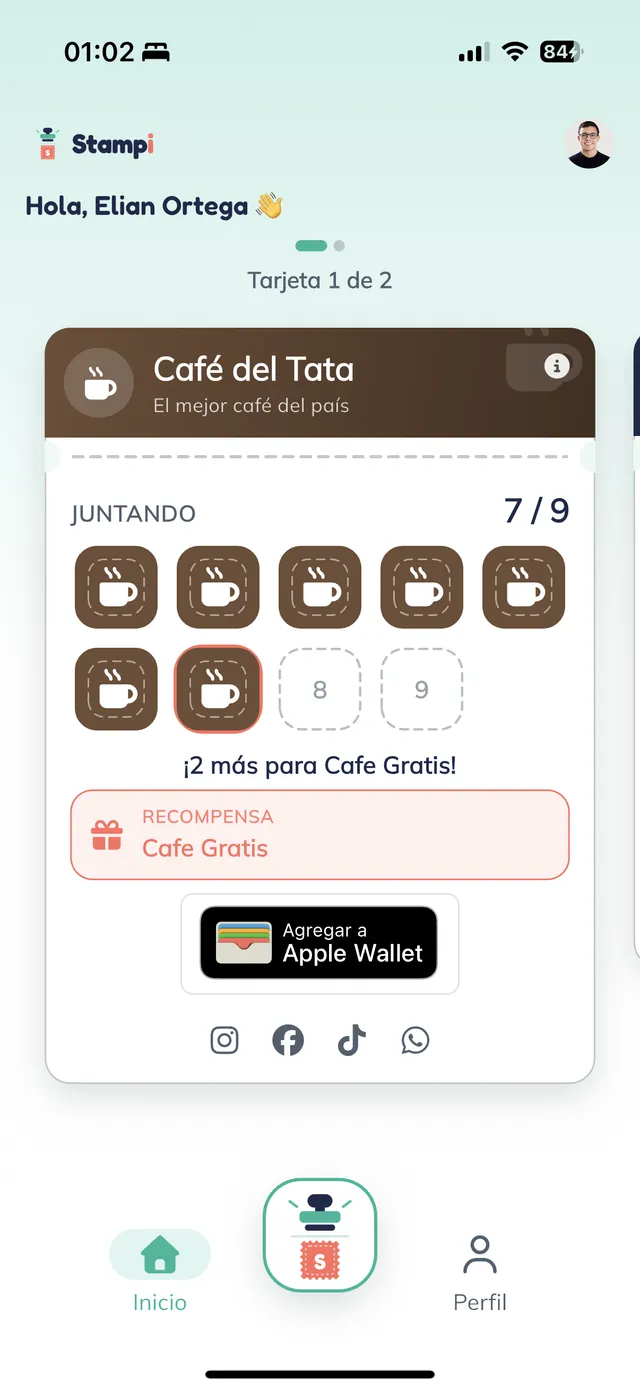
From inside the app too
If your customer already has the Stampi app, the card also carries the "Agregar a Apple Wallet" (add to Apple Wallet) button on the home screen. Same action: they tap it and save the card to their wallet.
Tip: On an Android phone, that same button reads "Agregar a Google Wallet" (add to Google Wallet).
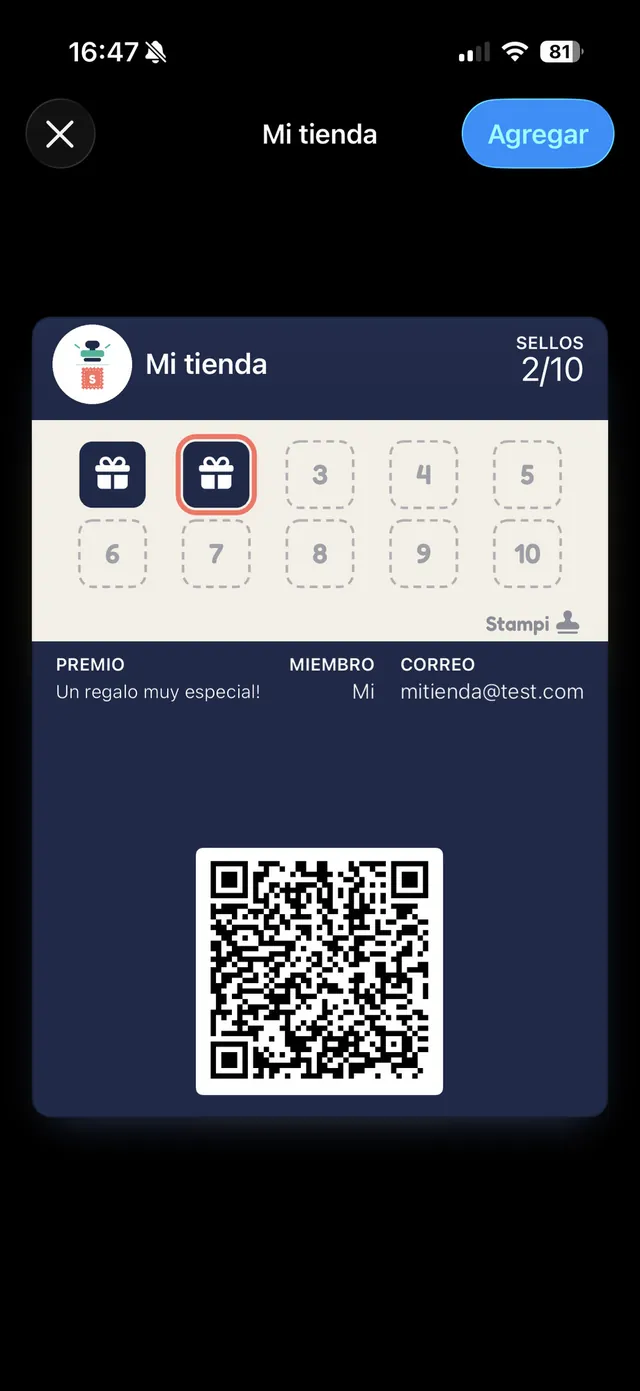
iPhone: confirm in Apple Wallet
On tapping "Agregar a Apple Wallet", the phone requests the card from Stampi and, after a few seconds, the Apple Wallet sheet appears with a preview of the pass. Your customer just taps "Agregar" (add), at top right.
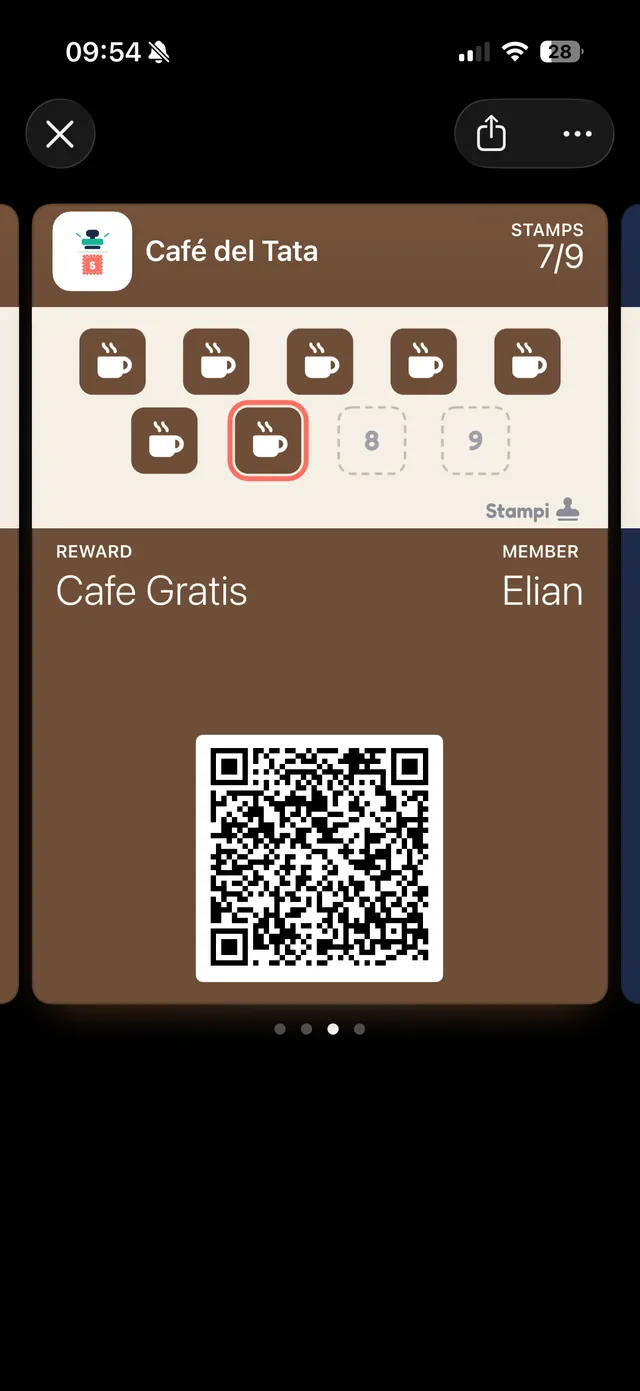
The card is now in Apple Wallet
Done: the stamp card is saved in Apple Wallet. Your customer opens it from the Wallet app whenever they want and sees their stamps ("7/9" in this example), their "Cafe Gratis" reward, and the code you scan at the counter.
Tip: When the customer comes back to your shop, you scan that code to give the stamp and the pass in the wallet updates itself.
Android: confirm in Google Wallet
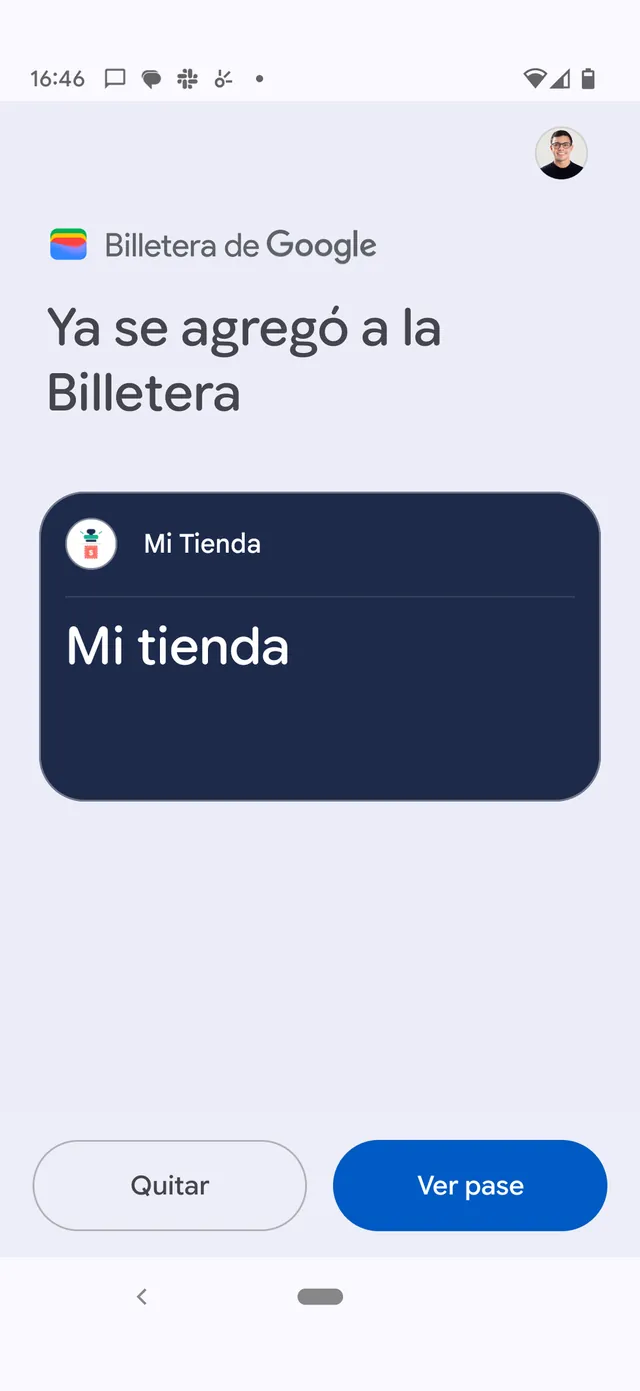
On Android it is the same. Your customer taps "Agregar a Google Wallet" (add to Google Wallet) and, after a few seconds, Google Wallet confirms with "Ya se agregó a la Billetera" (added to the wallet). From there they can tap "Ver pase" (view pass) to open their card.
The card is now in Google Wallet
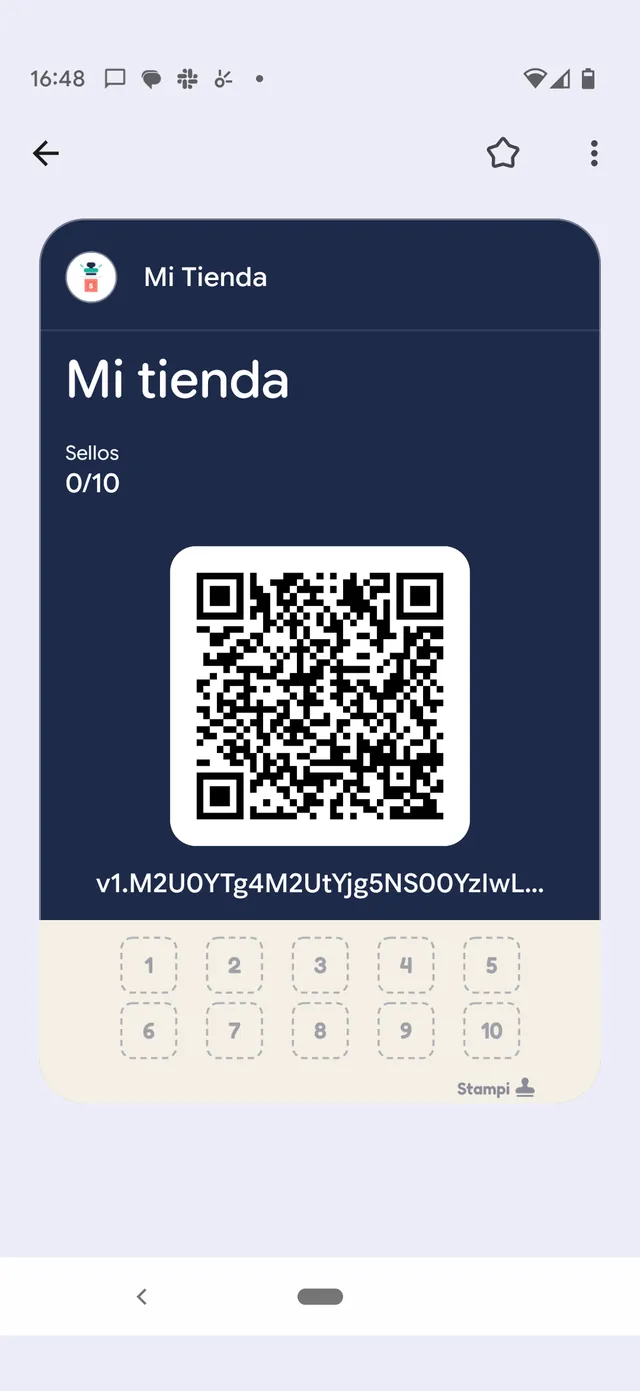
On the Android phone, the card sits inside Google Wallet, with its counter code and the stamp grid. Your customer keeps it at hand, without opening any other app.
The first stamp reaches the wallet
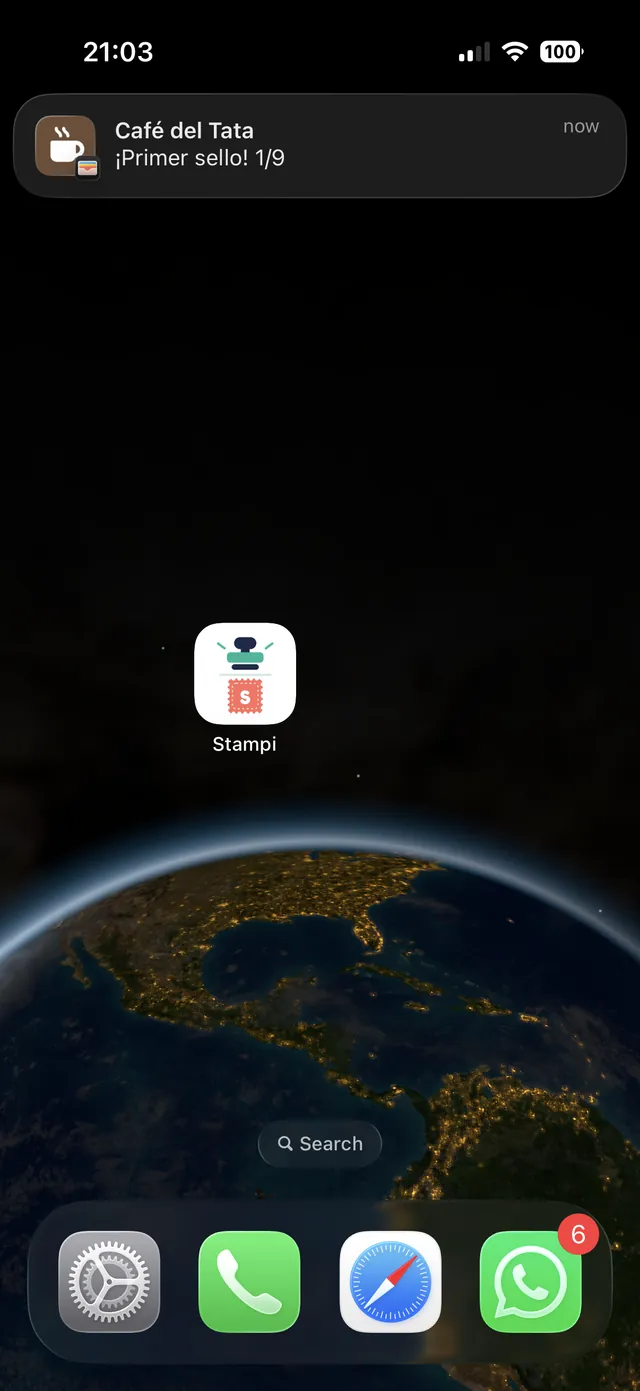
From the first stamp on, the customer gets a notice on their phone: "Café del Tata · ¡Primer sello! 1/9" (first stamp). The pass in the wallet updates itself with every stamp, so your customer always sees their count, without opening any app.
More tutorials
See all tutorialsWant to enable the wallet for your business?
Message us on WhatsApp and we will gladly turn on Apple Wallet and Google Wallet for your card.
Message us on WhatsApp