
Tutorials
Give stamps remotely
With the customer’s full email, you find them and stamp their card from your phone.
This tutorial walks the full flow: you share the app, the customer sends you their email, and you find them by email to give their first stamp, without both people being in the same place.
Watch the videoOn video
Watch the full walkthrough on video
Prefer to watch before following the steps? This video walks the whole process from start to finish (narrated in Spanish); the step-by-step below mirrors it in English with the same screens.
Before you start
Two things make this flow work:
The email is the key
Stampi search behaves differently depending on what you type:
- The full, exact email finds anyone who has a Stampi account, even someone who has never visited your shop. They appear badged "Nuevo en tu tienda" (new to your shop).
- A name or a partial email only surfaces your current customers, badged "En tu tienda" (at your shop).
The first stamp enrolls the customer
When you give the first stamp to someone new, the app creates their card and applies the stamp in one action. The stamp is the enrollment: no need to register the customer first.
Open the Mostrador (counter)
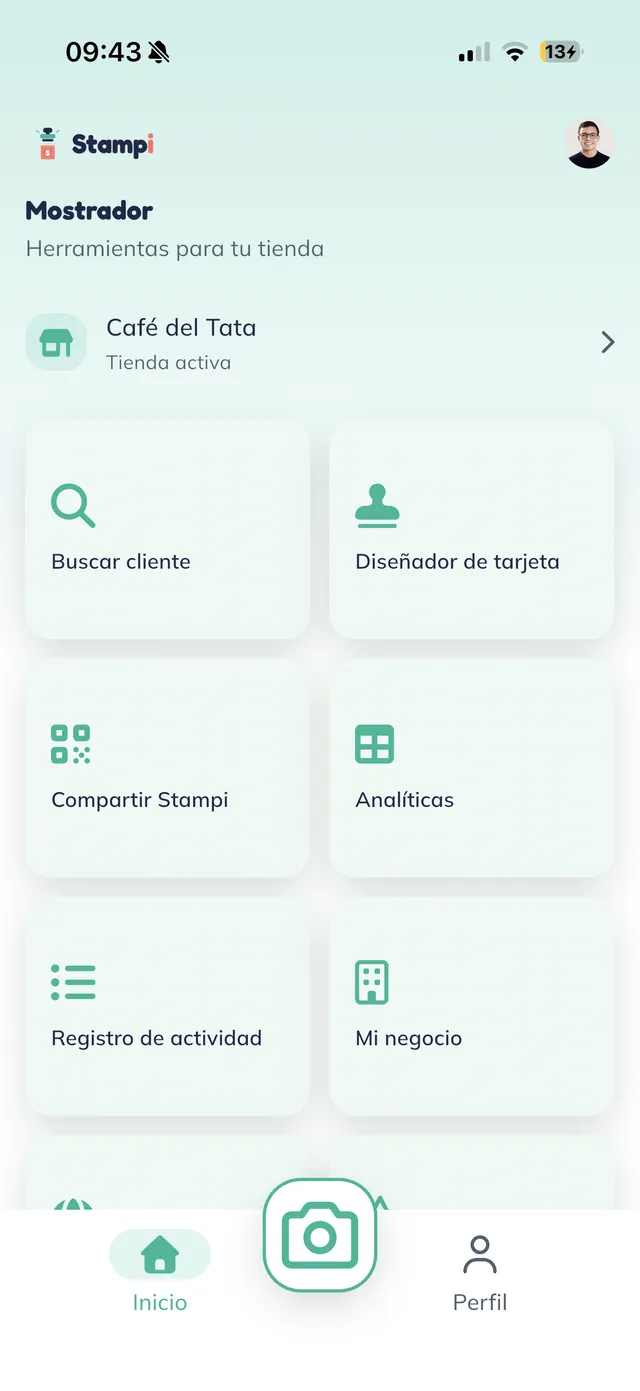
On your phone, open your business Mostrador (counter): the screen titled "Herramientas para tu tienda" (tools for your shop). Tap "Compartir Stampi" (share Stampi). This is where the whole remote-stamp process begins.
Note: The tools you see depend on your role:
- An owner sees the full grid of tools.
- A staff member sees only "Buscar cliente" (find customer) and "Compartir Stampi", which is all they need to enroll and stamp.
Share the app with your customer
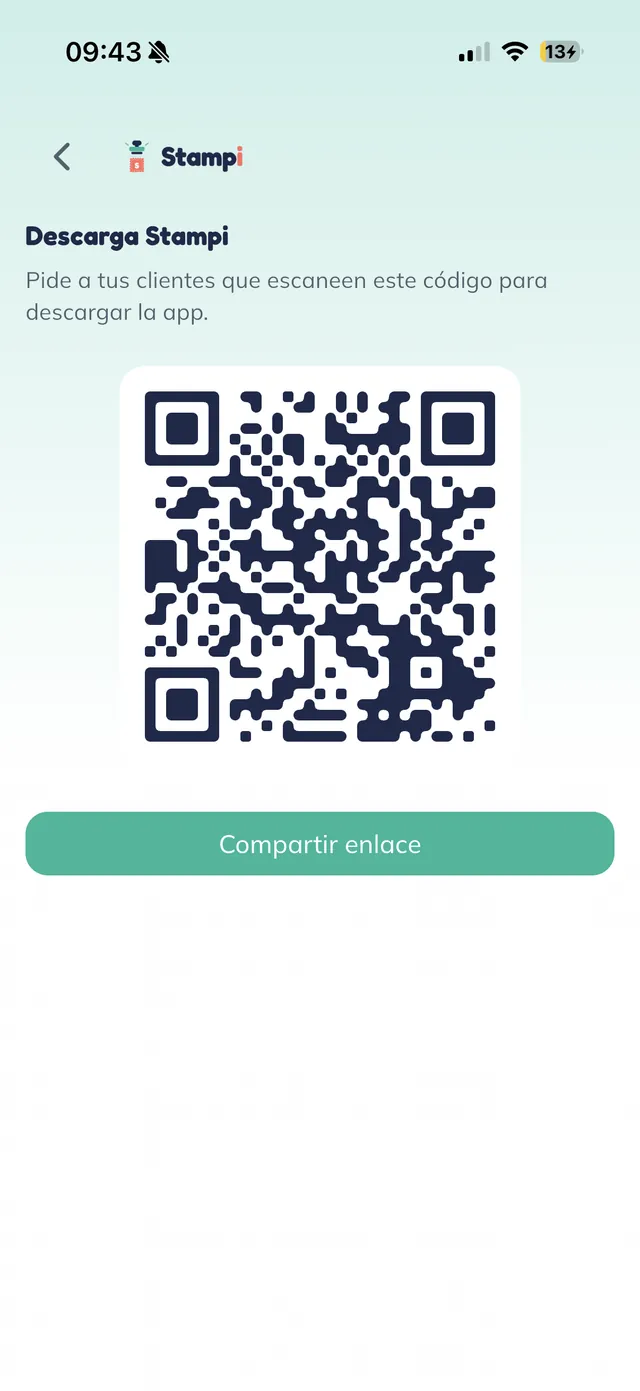
On the "Descarga Stampi" (download Stampi) screen, tap "Compartir enlace" (share link). Your phone share sheet opens with the download link (usestampi.com/download/); send it to your customer over WhatsApp so they install the app without being present.
Tip: Compartir Stampi is more than the download link: it also brings ready-to-send messages, like an invitation that already includes your business name and a step-by-step for the customer to send you their email. Send whichever one you prefer over WhatsApp.
The customer copies their email
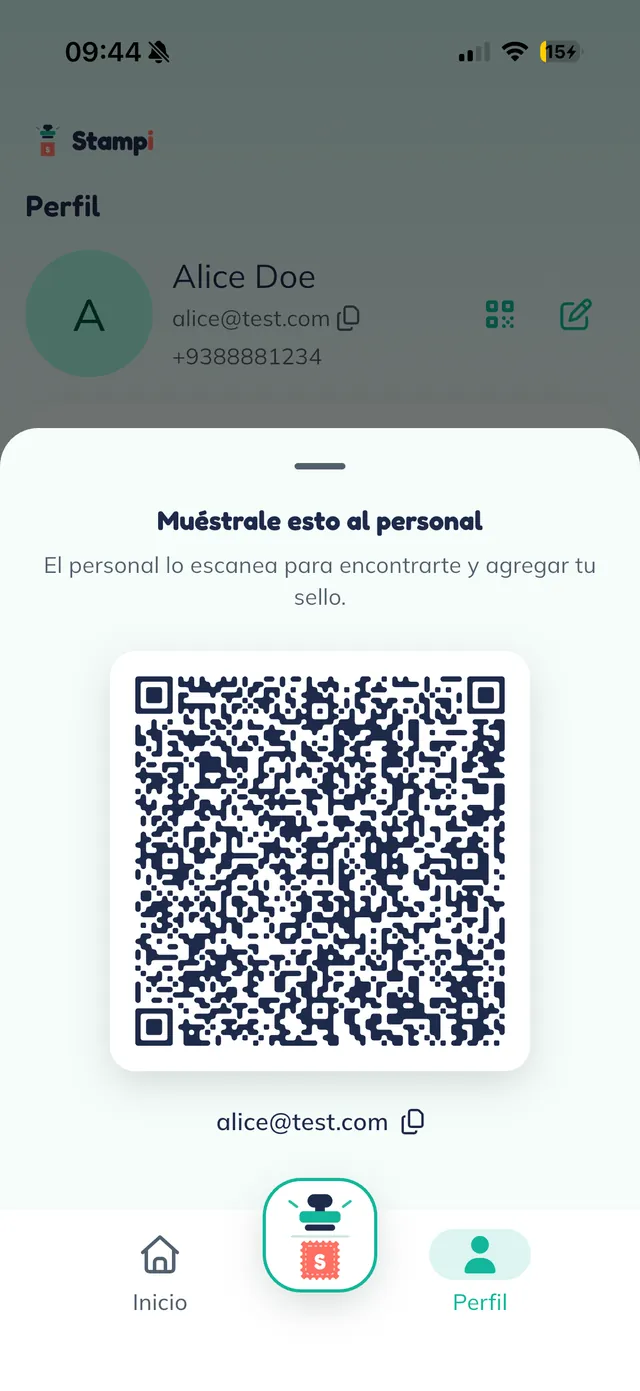
Now on your customer’s phone. In "Perfil" (profile), tapping the QR icon shows the "Muéstrale esto al personal" (show this to the staff) screen with their code and, below it, their email with a copy button. Your customer copies the email and sends it to you (over WhatsApp, for example).
Tip: There are two ways to surface the customer email: from Perfil → QR (this step) or from the central stamp button (steps 4 and 5). Either one works.
Alternate path: the stamp button
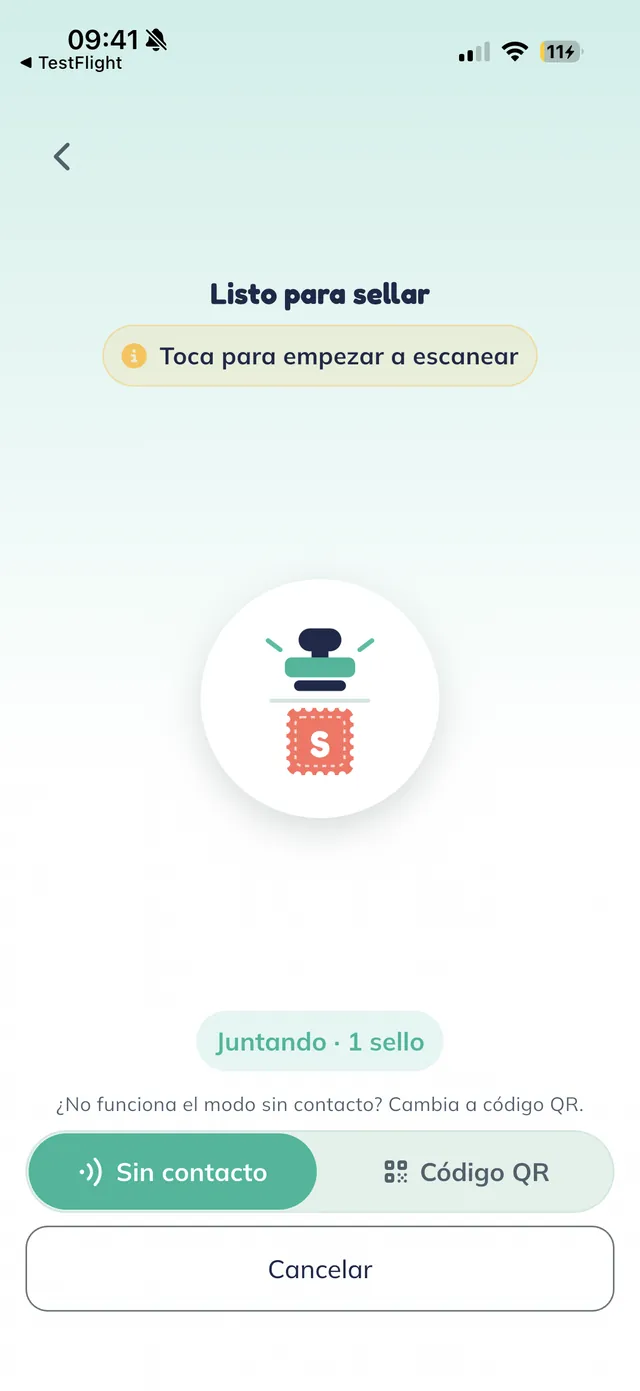
Still on your customer’s phone. The central Stampi button opens the "Listo para sellar" (ready to stamp) screen, with a toggle between "Sin contacto" (contactless) and "Código QR" (QR code). "Sin contacto" is the in-person mode; your customer switches it to "Código QR" to reach the same email screen.
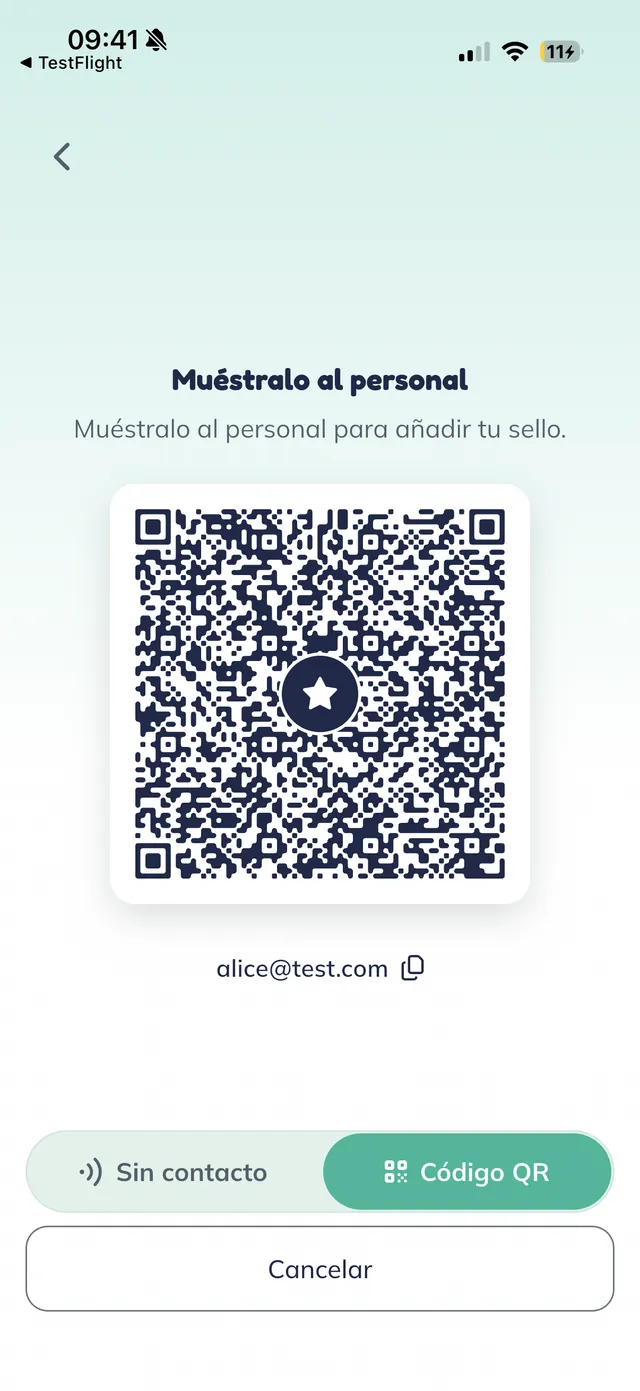
The customer switches to Código QR
Choosing "Código QR" shows "Muéstralo al personal" (show it to the staff) with your customer’s code and, again, their email with a copy button. It is the second way to get the email to you.
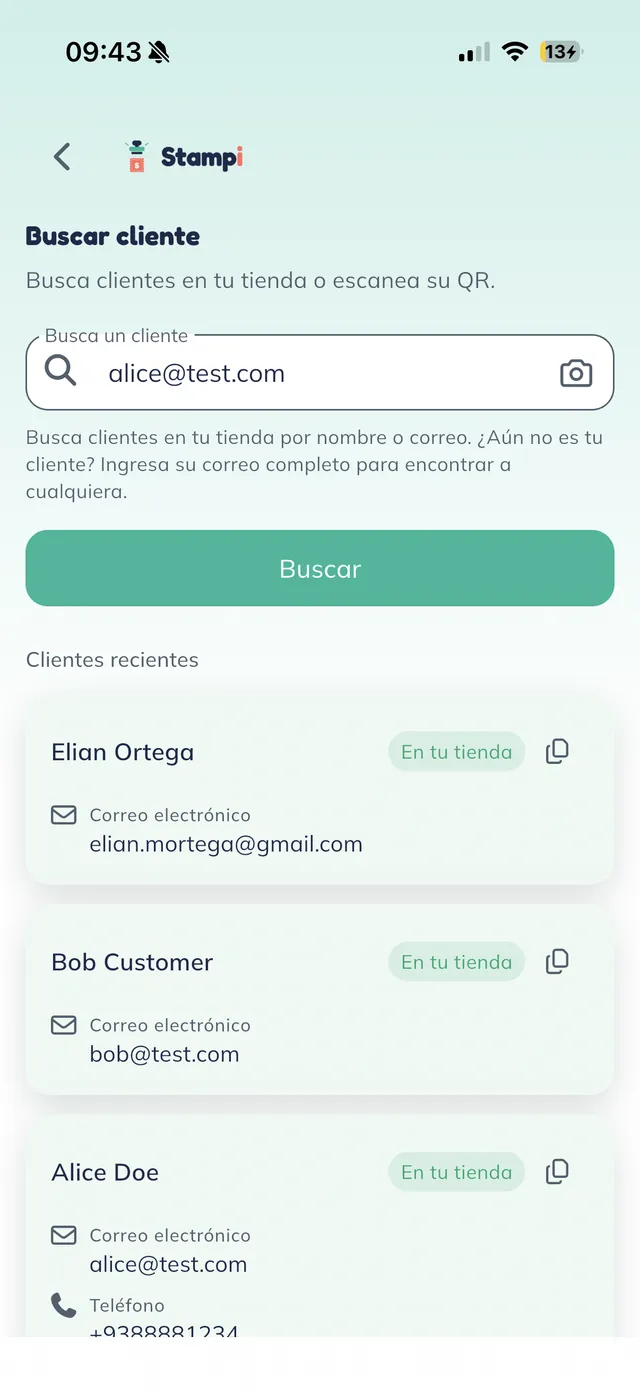
Open Buscar cliente (find customer)
Back on your phone, open the "Buscar cliente" (find customer) tool. You will see a search field, the "Buscar" (search) button, and your "Clientes recientes" (recent customers) list, each badged "En tu tienda" (at your shop).
Note: Search does not update as you type: type the email and tap "Buscar".
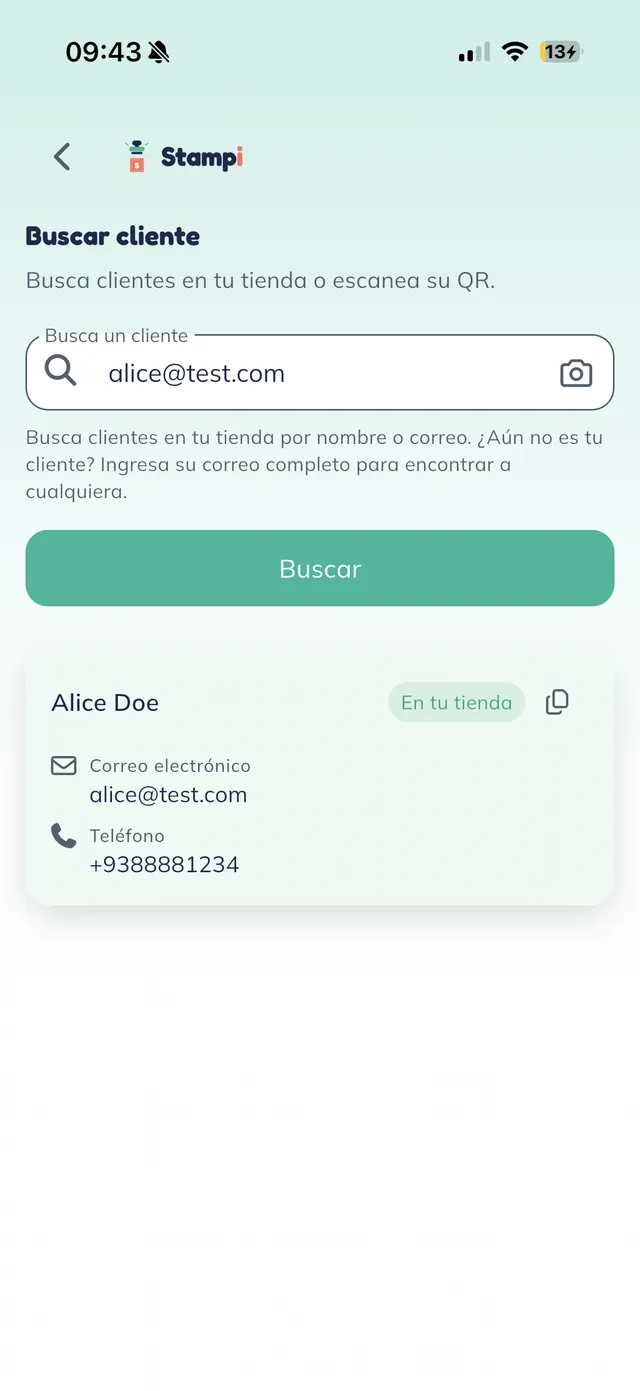
Paste the customer’s full email
Paste the email your customer sent and tap "Buscar". With the full email you find anyone who has a Stampi account, even a first-timer: they appear badged "Nuevo en tu tienda" (new to your shop). A name or a partial email only shows your current customers.
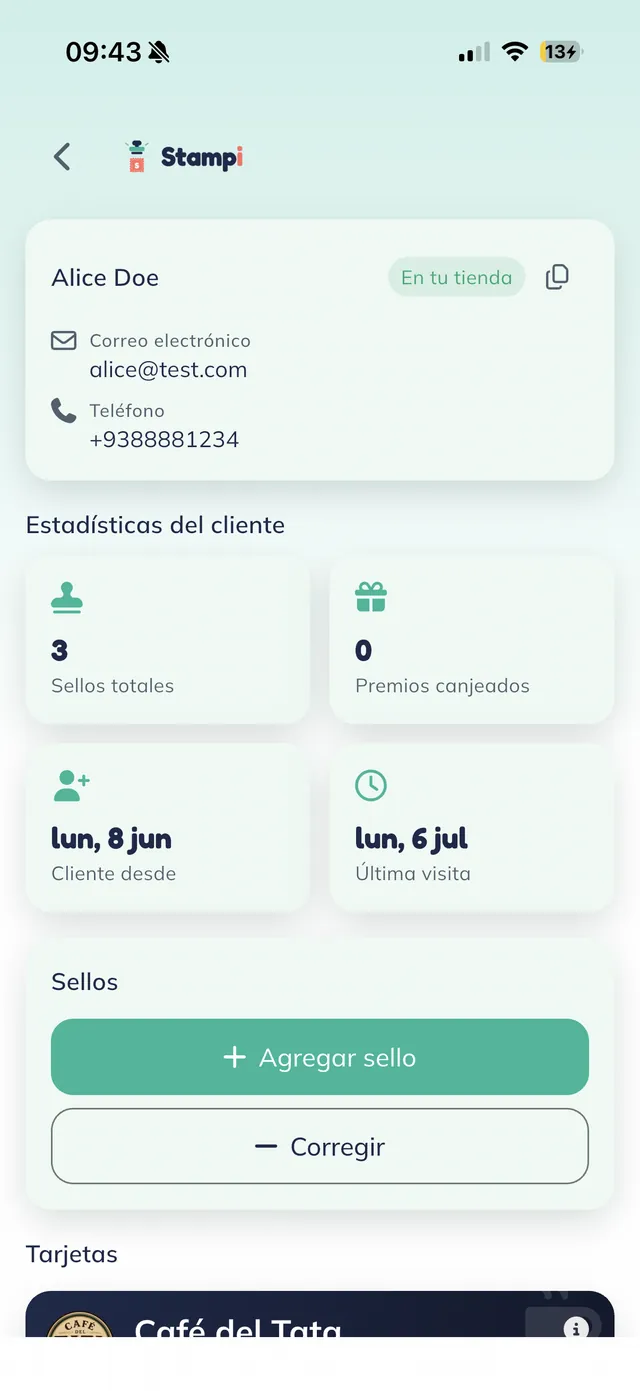
Open the customer record
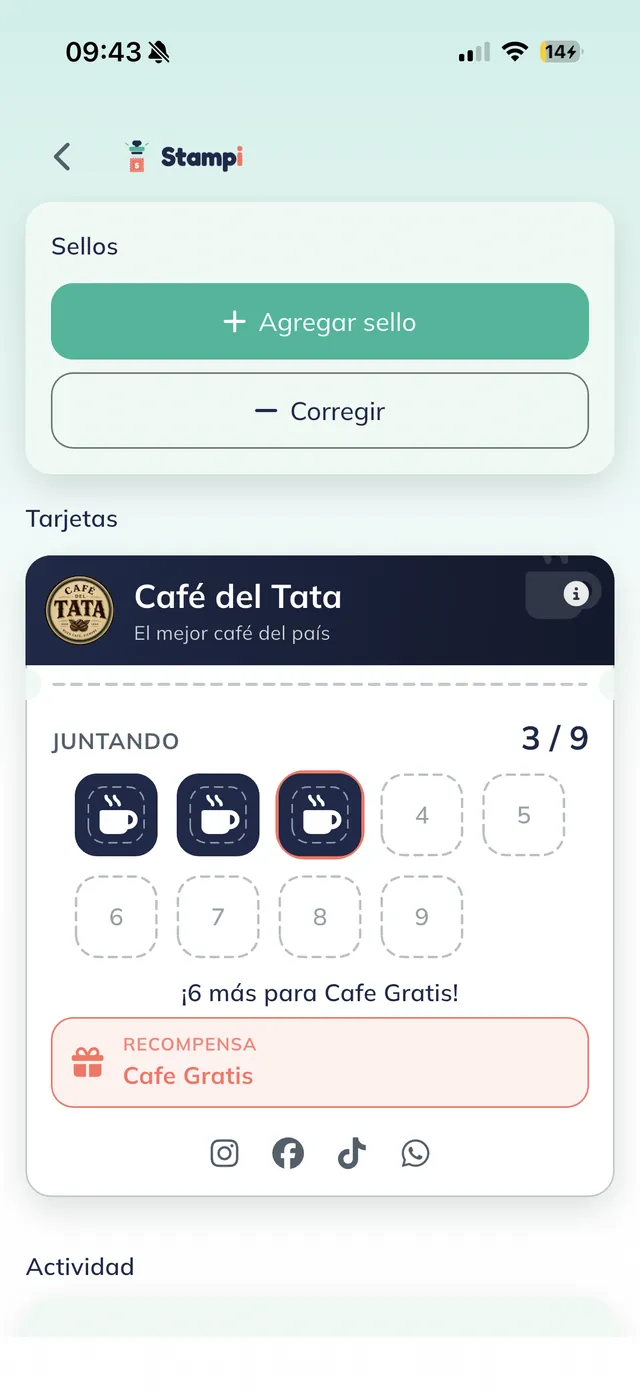
Tap the customer to open their record (ficha), the screen with all their details: name, email and phone, their "Estadísticas del cliente" (customer stats), and a "Sellos" (stamps) block with the "+ Agregar sello" (add stamp) and "− Corregir" (correct) buttons.
Note: "Estadísticas del cliente" (customer stats) is visible only to the owner (or an admin with permissions). A staff member sees the record and the stamp buttons, but not the stats.
Note: "− Corregir" removes one stamp. It opens the "¿Quitar un sello?" (remove a stamp?) dialog with an optional field to note the reason, and it never takes the card below zero. Confirm with "Quitar sello" (remove stamp).
Note: From the record you can also see the customer’s activity: when their first stamp was given and how each one was granted, in person or by QR code.
Give the stamp
Open your customer’s stamp card (here "JUNTANDO 3 / 9", meaning 3 stamps collected out of the 9 they need) and tap "+ Agregar sello" (add stamp). The stamp applies instantly and the card updates. On the customer’s side, the stamp shows up on their phone as soon as they refresh their card, with no QR code or physical stamp. For a brand-new customer, that first stamp also creates their card: enrolled and stamped in one tap.
Note: The stamp commits instantly, with no extra dialog. You will see a "Sello agregado (3/9)" (stamp added) style toast. Only "Corregir" asks for confirmation.
Warning: Each card locks in the number of stamps needed to complete it and earn the reward. The card created with that first stamp keeps whatever number you have configured at that moment.
- If you later change that number, this customer keeps theirs until they finish their card.
- The new number only applies to cards created after the change.
Note: There is no automatic daily cap on manual stamps. If you want a one-per-day rule, add it as a card condition ("Solo aplica por 1 compra al día", only valid for 1 purchase per day).