
Tutorials
Stamp from a Wallet pass
When the customer shows their card saved in Apple or Google Wallet, you open the camera, scan the code, and confirm the stamp.
This tutorial walks a short flow: your customer shows their loyalty card saved in Apple Wallet or Google Wallet, you open the camera from your admin profile, scan the pass code, and confirm the stamp. The process is identical on both wallets.
Before you start
Two things make this flow simple:
The customer does not need to open the app
The card lives in the customer’s phone Wallet. When they open it in Apple Wallet or Google Wallet, the pass shows the stamps collected and, below, a code to scan; you just point your camera at that code. The customer does not have to open the Stampi app, and it works the same on both wallets.
The stamp reaches the Wallet on its own
You do not touch the customer’s phone. Once you confirm the stamp, the pass in their Wallet refreshes by itself a few seconds later and shows the new stamp.
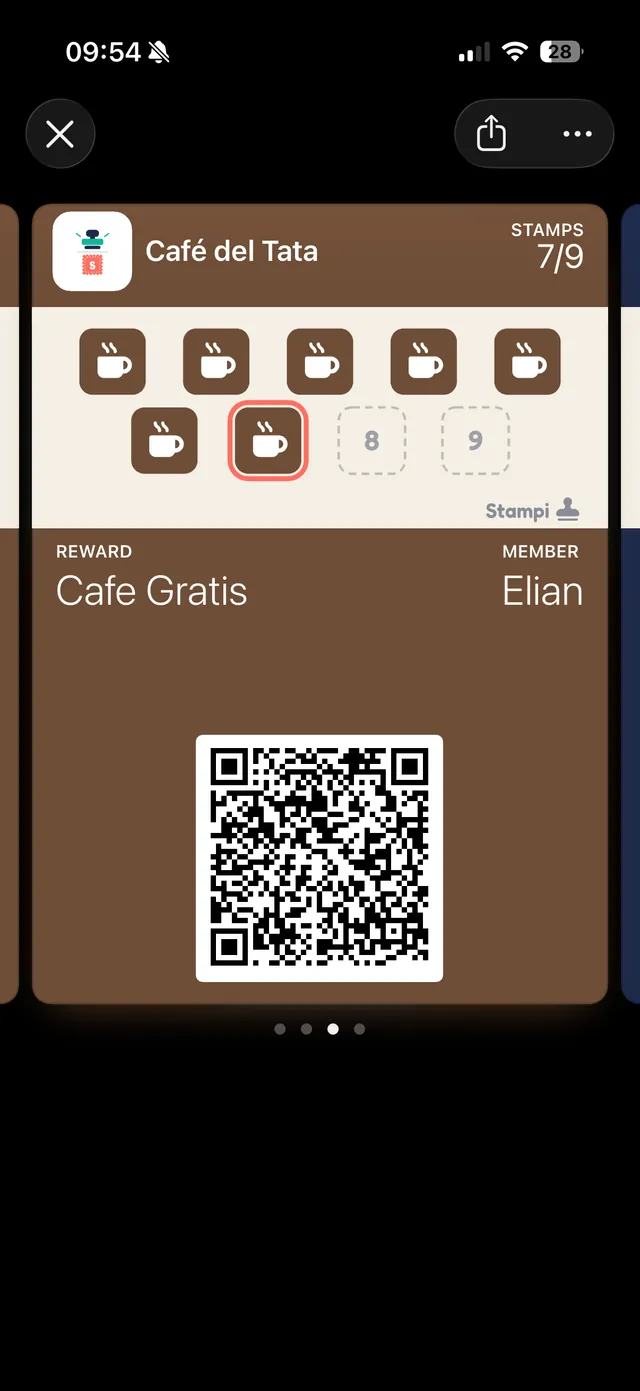
The customer shows their card in the Wallet
It all starts on the customer’s phone. Opening their loyalty card in Apple Wallet or Google Wallet shows the stamps collected (here 7 of 9) and, below, a code to scan. Ask them to show you that screen.
Tip: It is the same screen in Apple Wallet and in Google Wallet: both show the pass code to scan. It does not matter which phone or which wallet your customer uses.
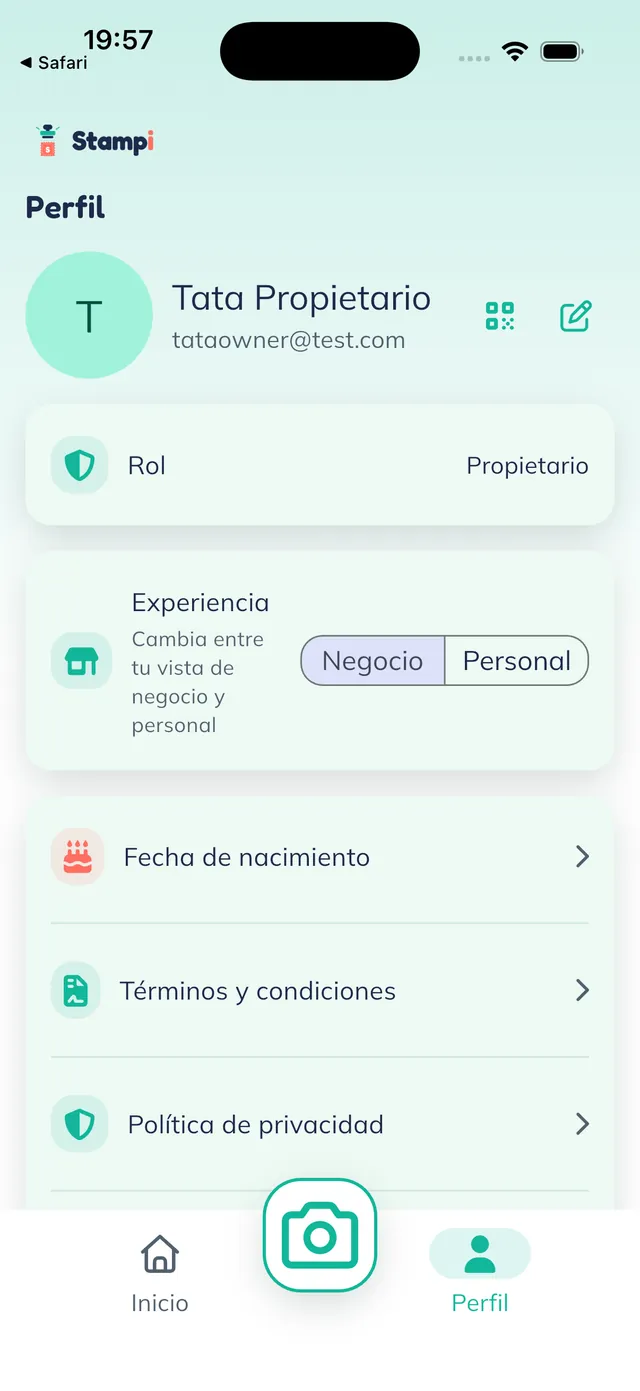
Open the camera from your profile
On your phone, with your account in the business (Negocio) view, tap the camera button in the center of the bottom bar. That button opens Stampi’s scanner, the same one you use to read any customer’s code.
Note: Confirm the "Negocio / Personal" (business / personal) toggle is set to "Negocio" (business). The camera button scans a code; it does not take a photo.
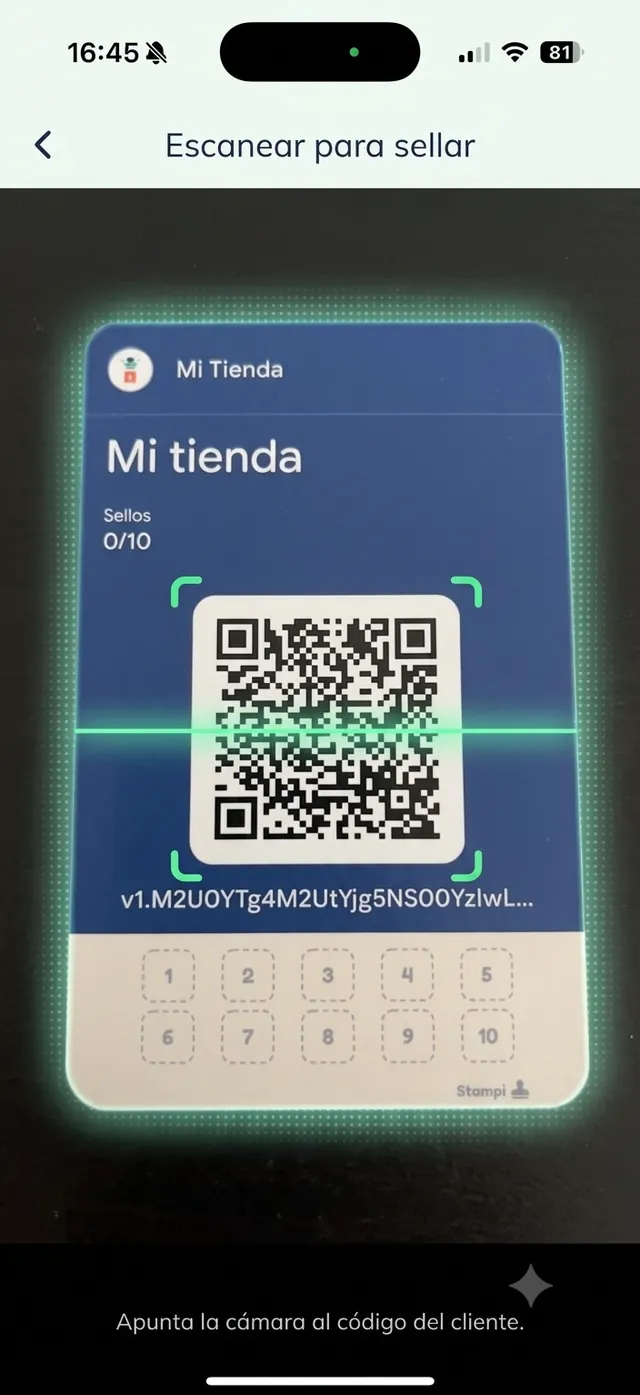
Scan the pass code
The "Escanear para sellar" (scan to stamp) screen opens. Point the camera at the code shown on the customer’s Wallet pass, as the message "Apunta la cámara al código del cliente" (point the camera at the customer’s code) instructs. Stampi reads it in a moment.
Tip: Hold the phone steady and in good light so the code fits fully in the frame. It is the same scanner whether the code is on a Wallet pass or inside the customer’s Stampi app.
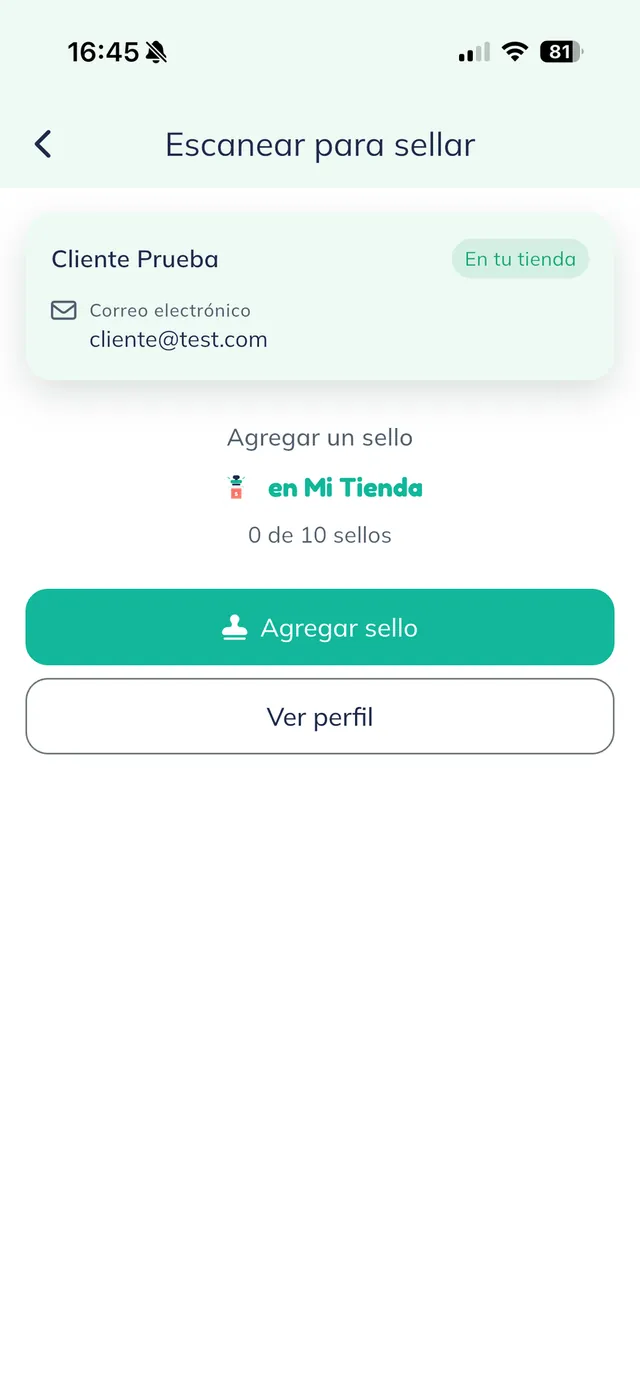
Confirm the stamp
As soon as it reads the code, Stampi asks whether to add the stamp to that customer. Tap the add option to confirm it. If you scanned the wrong person by mistake, dismiss the prompt without adding.
Note: It is the same confirmation shown when scanning any customer code: the stamp is not applied until you confirm it.
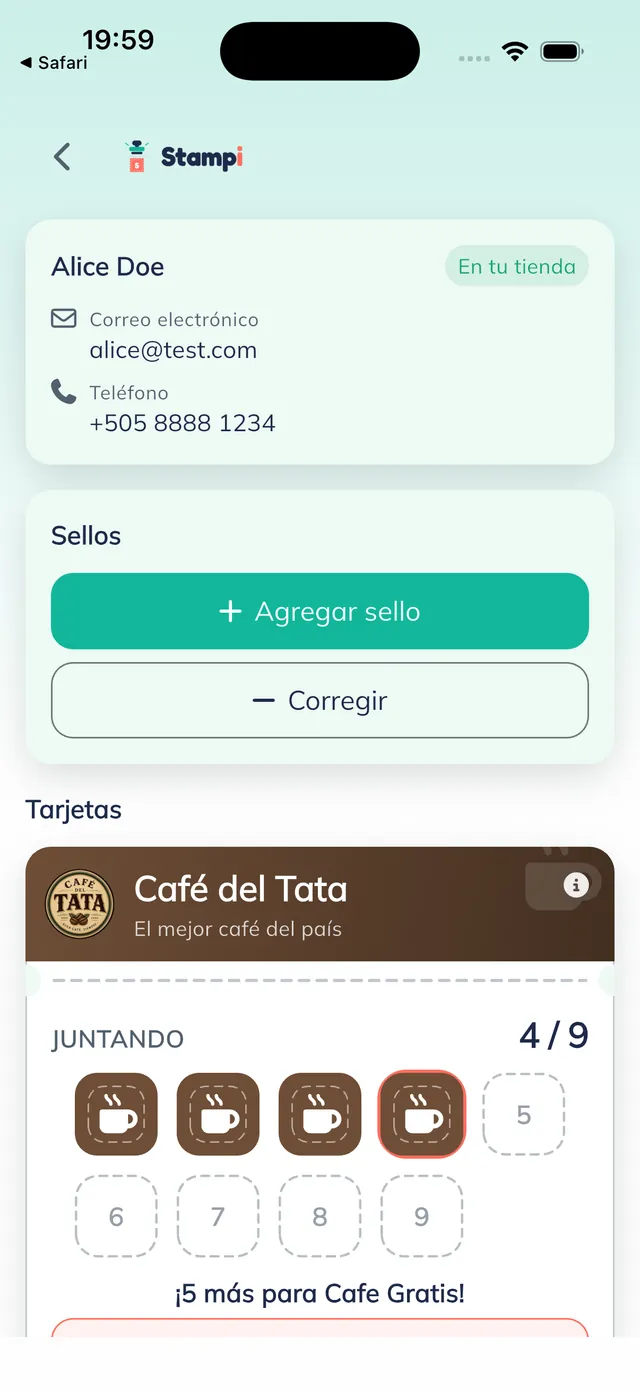
The stamp is added
Done: the stamp is added and the customer’s card goes up by one (here the Café del Tata card moves to "JUNTANDO 4 / 9", meaning 4 stamps collected out of the 9 they need). In the customer record you see the up-to-date count, badged "En tu tienda" (at your shop).
Note: The pass in the customer’s Wallet does not change instantly: it takes about 3 seconds to refresh and show the new stamp. That is normal; do not re-scan thinking it failed.