
Tutorials
Stamp with the customer’s QR code
The customer shows you their QR code, you scan it from your Mostrador (counter), and you give the stamp on the spot.
This tutorial walks the in-person method: the customer opens Stampi and shows their QR code, you open the camera from your Mostrador (counter), scan it, and give the stamp. You can also give it from the customer record.
Watch the videoOn video
Watch the full walkthrough on video
Prefer to watch before following the steps? This video walks the whole process from start to finish (narrated in Spanish); the step-by-step below mirrors it in English with the same screens.
Before you start
Two things make this method easy:
The QR code is for serving in person
Use the QR code when the customer is in front of you at the counter: they show their code and you scan it. If the customer is not present, this method does not apply: in that case you look them up by their full email, which is the remote-stamp tutorial.
Two ways to surface the code
The customer can reach their QR code by two paths, and both show the same code:
- From the central Stampi button (the sello), switching to "Código QR" (QR code).
- From "Perfil" (profile), tapping the QR icon.
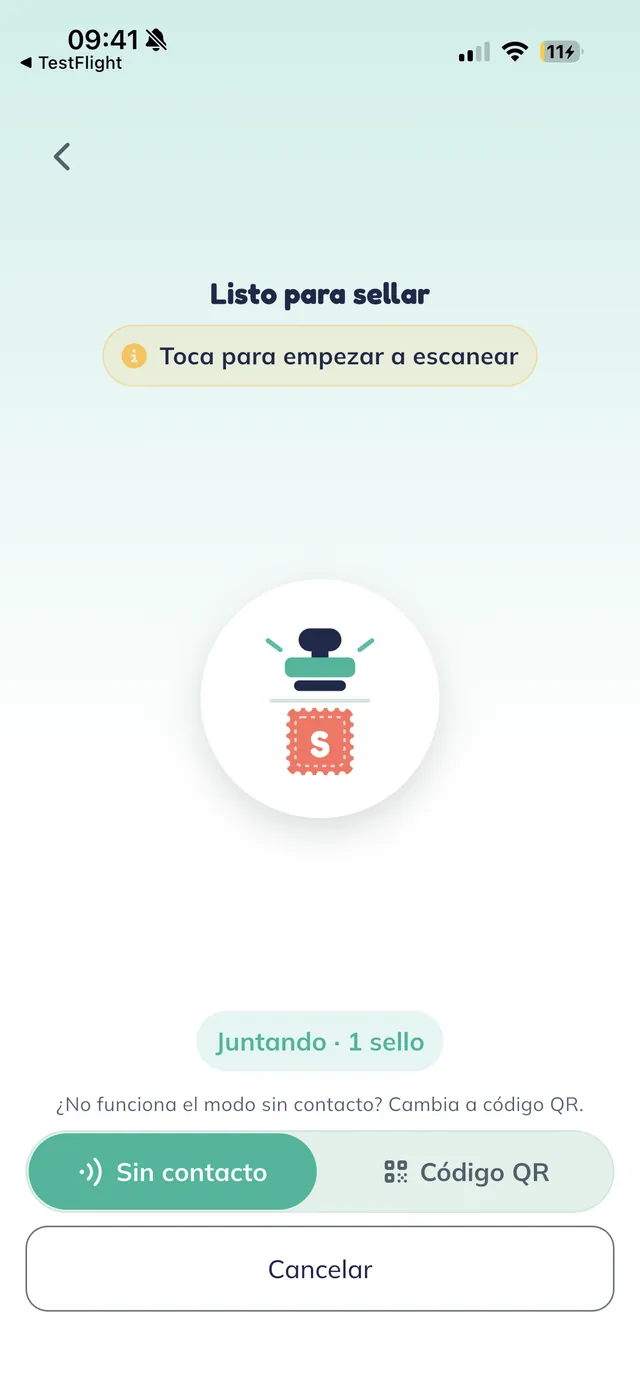
The customer opens Stampi
On the customer’s phone. The central Stampi button (the sello) opens the "Listo para sellar" (ready to stamp) screen, with a toggle between "Sin contacto" (contactless) and "Código QR" (QR code). "Sin contacto" is the in-person tap mode with the counter tag; to stamp with the camera, the customer switches it to "Código QR".
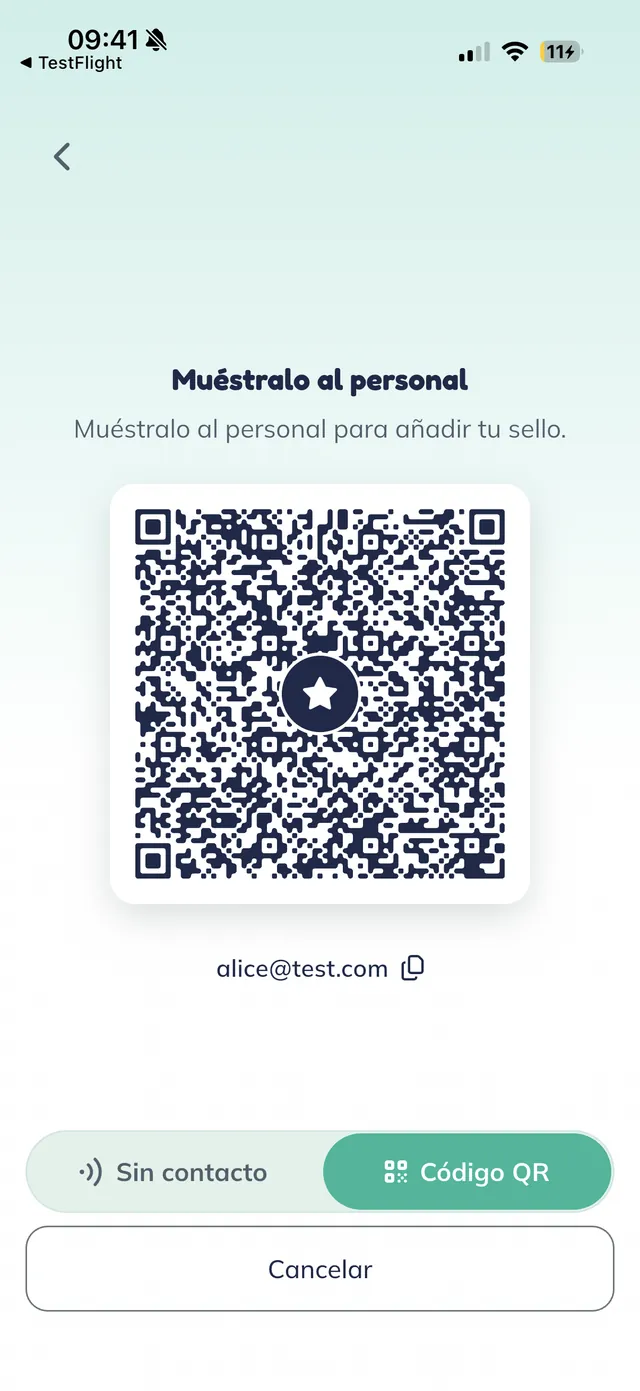
The customer shows their QR code
Choosing "Código QR" shows "Muéstralo al personal" (show it to the staff) with the customer’s QR code and, below it, their email. The customer holds this screen out for you; that code is what identifies them in Stampi.
Tip: There are two ways to reach this code: from the central Stampi button → "Código QR" (this step) or from "Perfil" (profile), tapping the QR icon. Either one shows the same code.
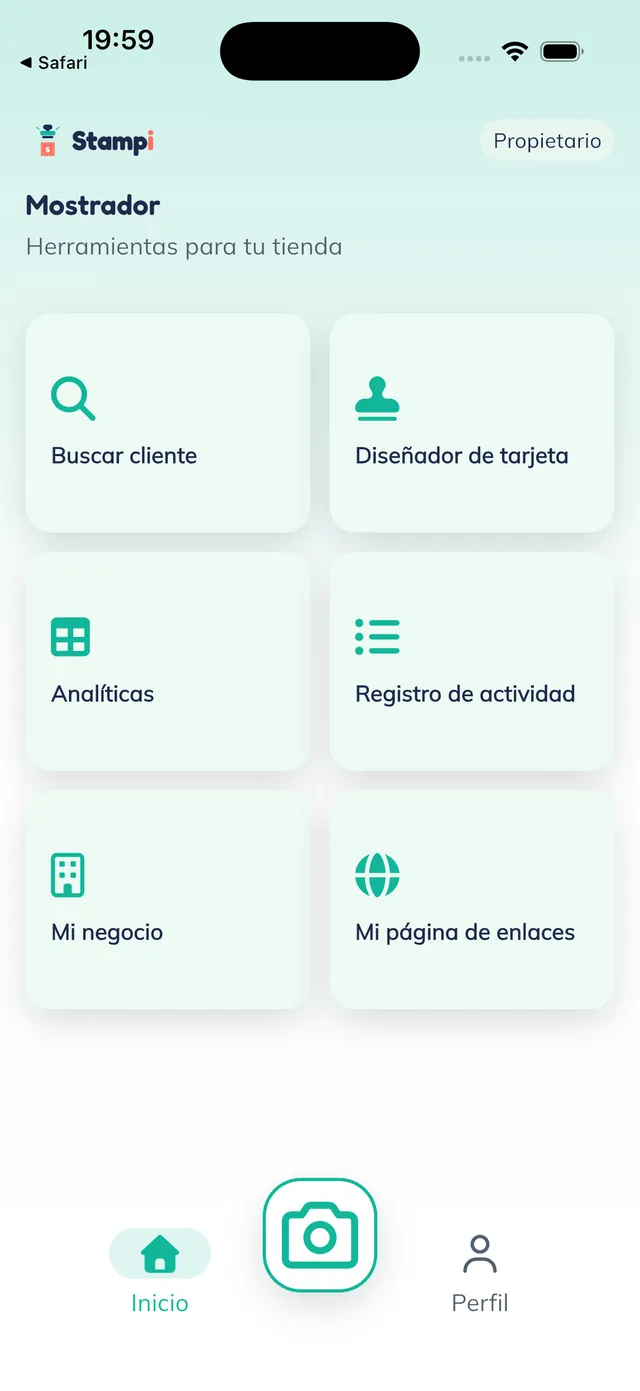
Open the camera from your Mostrador (counter)
Now on your phone, in the Mostrador (counter): the screen titled "Herramientas para tu tienda" (tools for your shop). In the bottom bar, tap the camera button in the center, between "Inicio" (home) and "Perfil" (profile). In the business app that button opens the scanner to stamp; in the customer app, the same spot is the sello button.
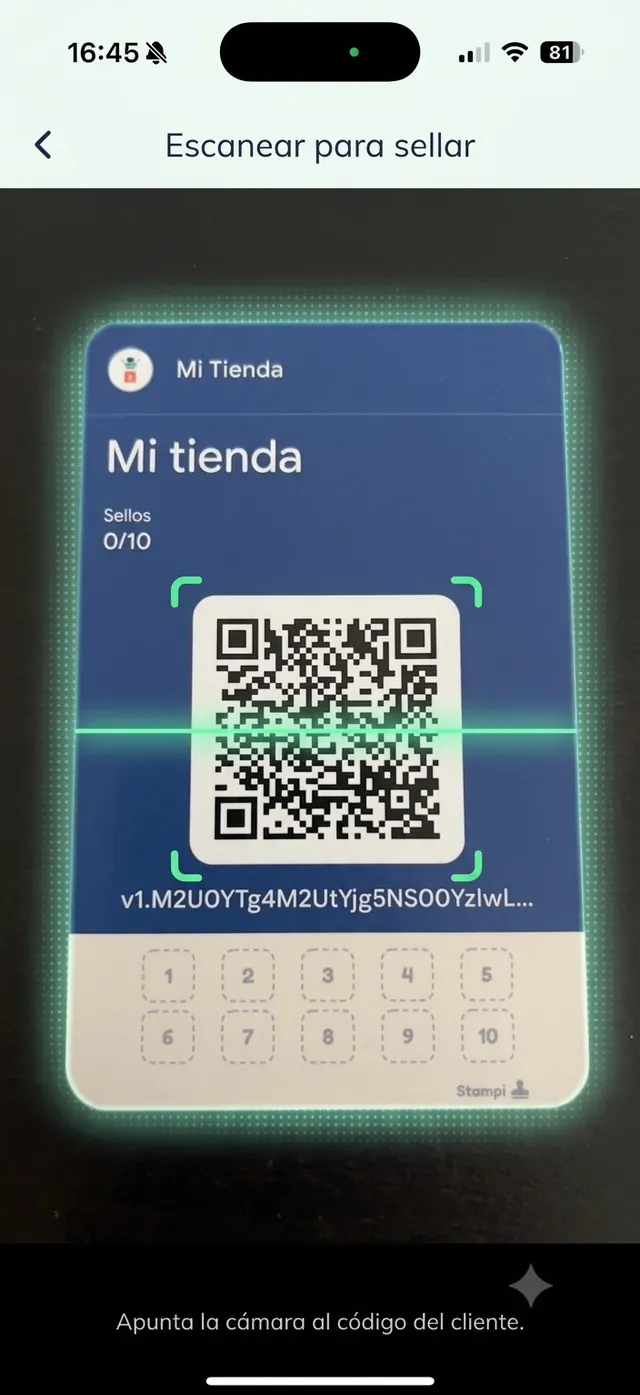
Scan the customer’s code
"Escanear para sellar" (scan to stamp) opens the camera. Point it at the QR code the customer is showing you, as the prompt says: "Apunta la cámara al código del cliente" (point the camera at the customer’s code). As soon as the camera reads it, Stampi recognizes the customer.
Give the stamp
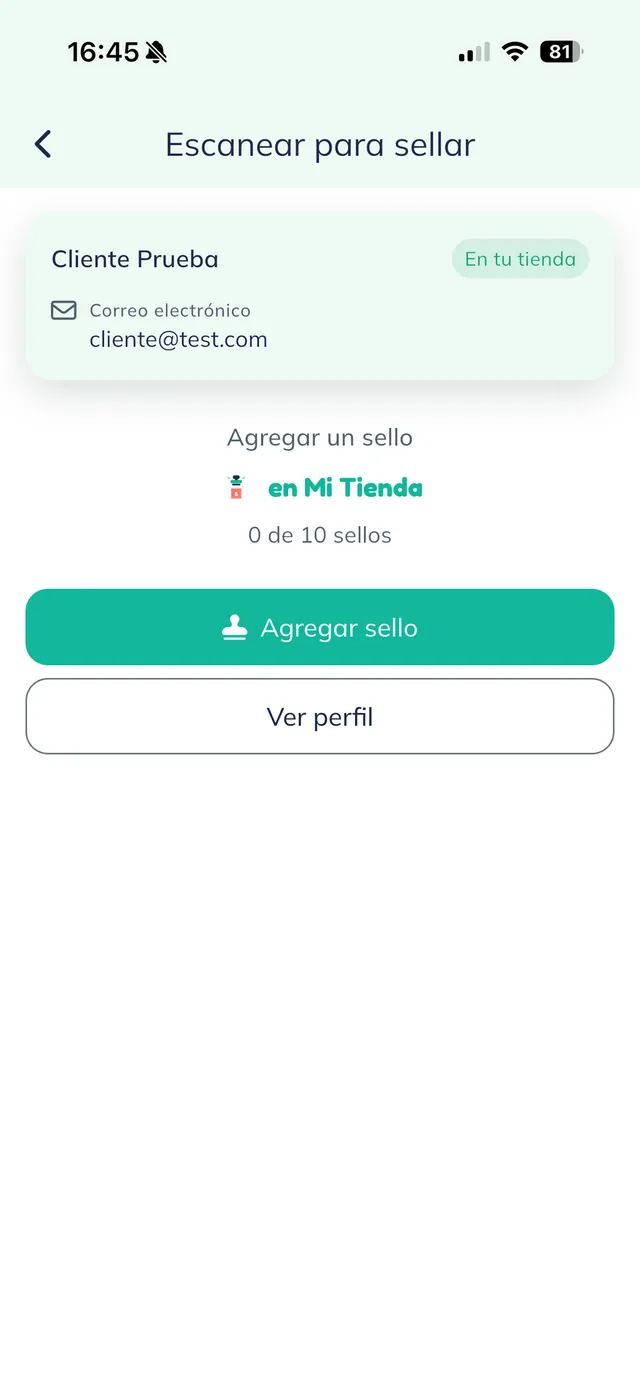
Once it reads the code, Stampi shows the customer’s details and lets you add the stamp right there. The stamp applies instantly and, on the customer’s side, shows up on their phone as soon as they refresh their card. Afterward you can scan another customer or return to "Inicio" (home).
Note: The stamp commits instantly, with no extra dialog. For a brand-new customer, that first stamp also creates their card: enrolled and stamped in one step.
The other way: from the customer record
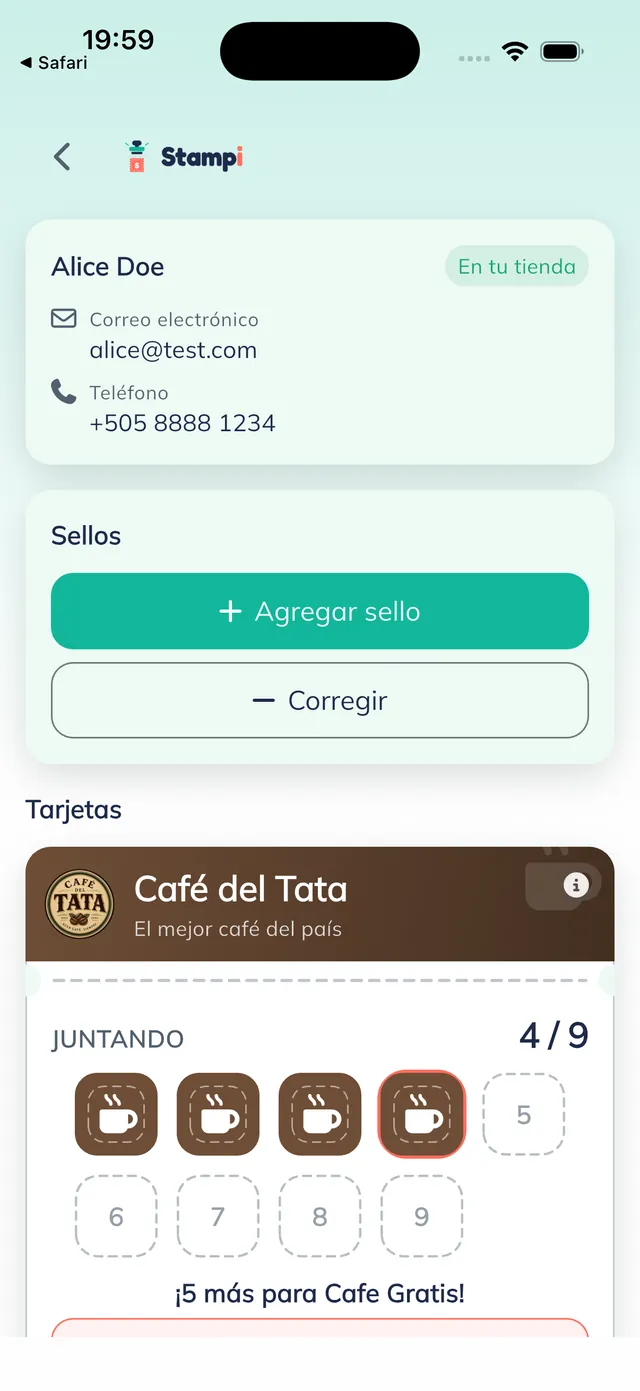
You can also give the stamp by opening the customer record (ficha): the screen with their name, email and phone, a "Sellos" (stamps) block with "+ Agregar sello" (add stamp) and "− Corregir" (correct), and their card below (here "JUNTANDO 4 / 9", meaning 4 stamps out of the 9 they need). Tap "+ Agregar sello" and the stamp lands.
Note: You reach the customer record by scanning their code or by finding them by email. To stamp someone who is not present, look them up by their full email.
Note: "− Corregir" removes one stamp, with an optional field to note the reason; it never takes the card below zero.